How to add the ReachDeck Toolbar to your site
A quick recap
The ReachDeck Toolbar adds speech, reading and translation support to your website. It gives your online visitors a choice in how they understand your content. Helping to reduce barriers between your digital content and your diverse online audiences.
Logging into the portal
To log in, simply, click on the button below to access the portal. Then, sign in using Google, Microsoft, Facebook, Twitter or LinkedIn.
Heads up! Select the login option that uses the same email address that you used to register with us.
When you're in, select your contract. Then head to the Toolbar section of your dashboard. Click on your website URL you would like to add the Toolbar to. Once you’re there, you’ll see the four step process to ‘Tailor the Toolbar'.
Missed something? Head back to the top of the page.
4 steps to setting up and adding the Toolbar to your site
The ReachDeck Toolbar gives your visitors a choice in how they understand your digital content. So naturally, we want you to have a choice in how the Toolbar appears on your website.
Follow our simple step-by-step guide below to tailor your Toolbar. And you’ll have the code you need to add it to your website.
But first, check out our four tips to tailoring your Toolbar.
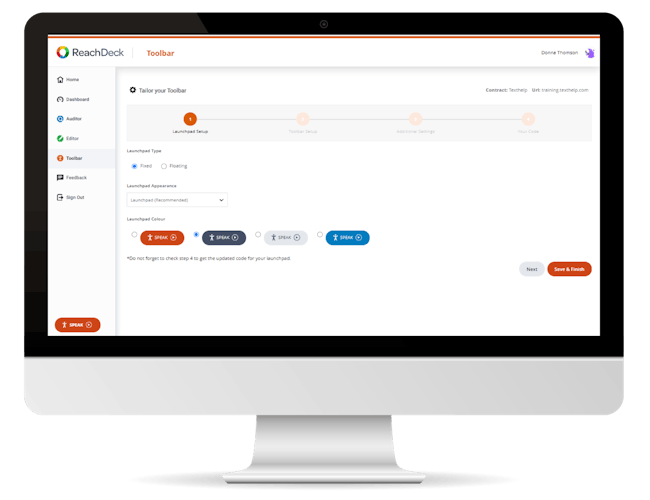
Step 1. Launchpad Setup
At the first step, you’ll be able to choose your launchpad type and launchpad appearance.
The launchpad type refers to whether you'd like the launchpad to be fixed or floating on a web page. A floating launchpad moves with the user as they scroll down the web pages on your site. A fixed launchpad means you can place it on your website exactly where you'd like it. And that's where it stays, meaning it won't accidentally hide any of your content from view. That's why it's our recommended option.
In terms of the launchpad appearance, you can choose from a few different options. Click on the drop-down menu and select to view each one. You'll notice we have a recommended option. It has universally recognised symbols, and a localised label that speaks for itself.
When you’re happy with your choices, click ‘Next’.
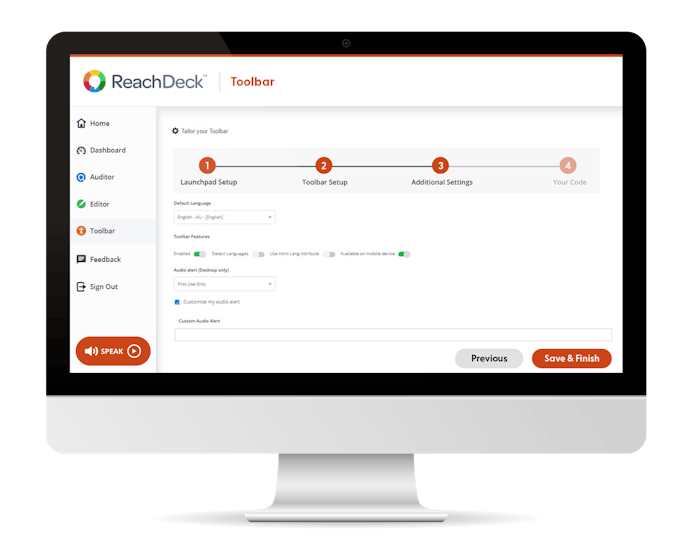
Step 2. Toolbar Setup
Now it's time to personalise the Toolbar.
During this step you can:
- Select your preferred colour theme
- Choose to dock the toolbar, or let it to float
- Turn certain features on and off
- Select a version of the Toolbar. We advise you to select the ‘always latest’ version. That means the ReachDeck Toolbar will automatically update to our latest offering. Or, if you prefer to test updates before you go live, you can choose a previous version.
Step 3. Advanced Settings
Here, you can select advanced options. For example...
- Select a default language of your choice
- Set an audio alert to tell your online visitors what the Toolbar is. The content of the audio alert can also be customised
Step 4. Adding the Toolbar to your site
Once you've completed selecting all your options, click 'Save & Finish'.
You'll then be brought to the last section, and given your code. It’s the code you need to add the launchpad to your website.
To add the Toolbar to your site, follow the instructions given in the portal. If you don't have access to your Content Management System (CMS), pass the code over to the website owner in your organisation.
Did you choose to fix your launchpad?
If you chose the fixed launchpad type at Step 1, we have a top tip for you! If you're not sure where to place it, we think it's best placed at the top of your webpage.
Why add the Toolbar to your site? Here's how it can help.
The ReachDeck Toolbar gives you a seamless tool for making the text content of your online materials accessible. It's indispensable for companies who care and 'get it'. We recommend it at every opportunity.
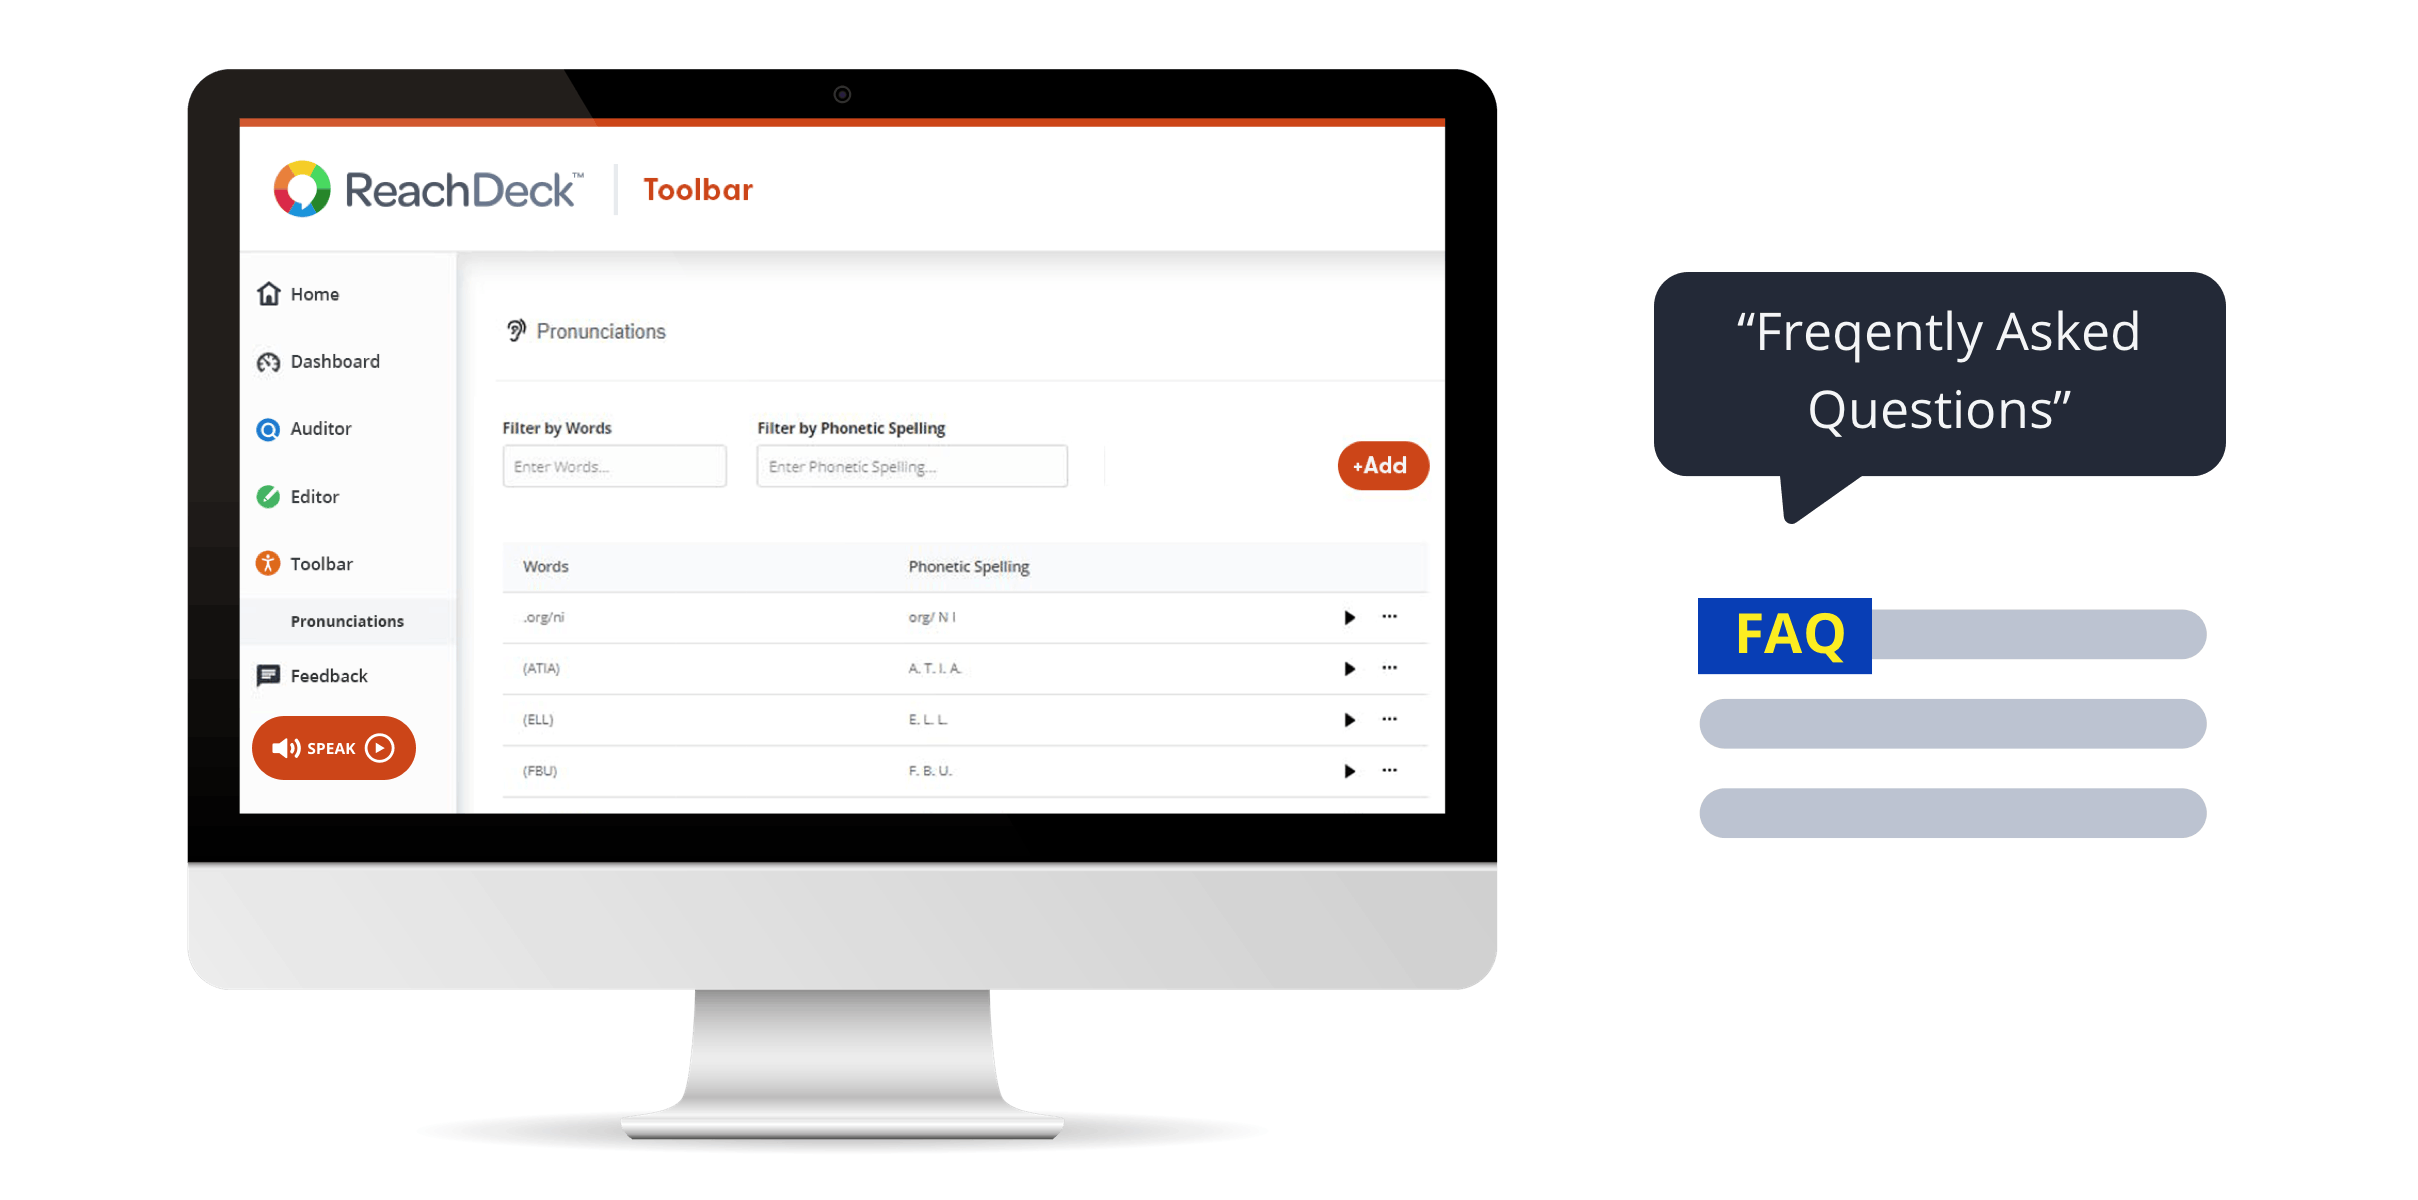
Before you leave the dashboard, did you know you can change how words are pronounced?
Before you leave the dashboard, click on ‘Toolbar’ again. You’ll see ‘Pronunciations’ underneath. Here you can change how text-to-speech says certain words. You can also choose to set acronyms to be read aloud in full.
Click the orange ‘Add’ button and a pop-up screen will appear. There, you can add your word and tell the Toolbar how you’d like it to be spoken.
Missed something? Head back to the top of the page.
Need help? No problem.
We’ve lots of resources to help you, including our friendly team.
Top tip: Ask us about reports
We can tell you how many of your site visitors are using the Toolbar. And what features they’re using most. Ask us and we’ll be happy to give you a report.
Tell your visitors about your new website addition
Share the news. Show what you’re doing to help make a difference in the digital world. We’ve got lots of resources to help you spread the word.
Missed something? Head back to the top of the page.